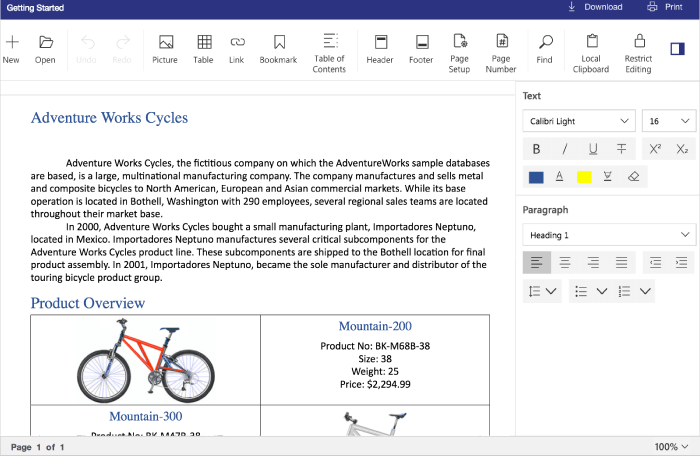
Syncfusion is excited to announce yet another value-added control in the form of the document editor in Syncfusion’s Essential JS 2 (WEB) platform. The document editor is lightweight JavaScript Word processor (HTML5-based, WYSIWYG, MS Word compatible) which allows you to create, view, edit, and print Microsoft Word documents (DOCX) and SFDT (Syncfusion Document Text) format documents. This control works without any 3rd party extensions, Microsoft Office, or interop. It is interoperable with other third-party frameworks such as Angular, React, and Vue.js.
In this blog, you will learn about the feature sets available, different modules of the document editor, and how to get started with the document editor.
While creating a document management application with document editing capability, most users want to stay away from ActiveX controls or browser extensions, as your application standards or brand will not be maintained when using those tools. With this control, however, you can achieve the following functionalities in your web application:
- View the document in read-only mode.
- Compose a new document from scratch interactively.
- Edit documents (DOCX, SFDT) from your web application.
- Print the document from your web application.
This document editor is designed to provide high performance in all aspects, but is especially powerful in the following ways:
- Fast Editing – All user interactions and document editing operations will run on the client-side, providing faster editing experience
- Virtualization – All pages in the document are rendered on-demand, reducing the initial load time and memory consumption when working with large documents.
- Lightweight – Each independent functionality is defined as a separate module. This helps when building a lightweight document editor in your application without sacrificing loading speed.
Key features
You can author a new document or edit an existing document with the following features of the document editor component.
- Supported elements – The document editor supports commonly used document elements like:
- Text – Create or edit document with various language texts.
- Image – Browse for an image and insert it into the document editor as an inline picture. Supports all common raster image formats like PNG, BMP, JPEG, GIF, and more. The images can be resized interactively.
- Table – Create simple and complex nested tables. You can add or remove cells and rows. The rows and columns of a table can be resized interactively by the user as needed.
- Hyperlink – Create a link in the document for quick access to web pages, files, emails, and bookmarks.
- Bookmark – Insert a bookmark to identify a specific part of the document. The user can navigate to an existing bookmark in the document interactively through a built-in dialog.
- Page Number – Add page numbers to the document that update automatically when the document grows or shrinks.
- Table of Contents – Add a table of contents to the beginning of the document to give an overview of the document content to easily navigate to specific sections. A built-in dialog provides intuitive options to choose heading and custom styles, add page numbers, and provide hyperlinks for easy navigation. After modifying an existing document, the user can update the table of contents through a context menu option.
- Header and Footer – Display information on every page of a document in regions at the top and bottom of a page. You can specify different header and footer for the first page of a document as well as different headers and footers for odd and even pages.
- Styles and formatting
- Text Formatting – The user can format the appearance of the text with options like font, font size, font style (bold, italic, underline), color, highlighting, strikethrough, subscript, and superscript.
- Paragraph Formatting – The user can change the appearance of a paragraph with options like indent, alignment, and spacing.
- Bullets and Numbering – Organizes items or creates an outline of the document with bullets and numbering ranging from a single-level to multilevel lists.
- Table Formatting – Customize the appearance of the table with fill color, border, margins, vertical alignment, and merge cell options. The appearance of text and paragraphs within the table can also be modified.
- Styles – The user can create, edit, and apply character and paragraph styles to ensure consistency within a document.
- Page Settings – Customize the structure and layout of the document with several options like page size, page margins, orientation, header, and footer distance.
- Find and replace – The user can search for words and navigate to their occurrences by clicking on the test results, similar to the Microsoft Word user interface. Text found in this way can be easily replaced.
- Clipboard Operations – The user can cut, copy, and paste formatted content within the same document. The user can also paste plain text to and from other applications.
- Export – The user can export the document to DOCX and SFDT formats on the client side.
- Import – Convert DOCX, DOC, RTF, and TXT format documents to SFDT from the server side and load the converted SFDT format in the document editor control.
- Print – The user can print the entire document or a specific page.
- Undo and Redo – Supports multiple levels of undo and redo operations.
- Interactions – Provides intuitive and touch-friendly UI options like zooming, context menu, navigation pane, and dialogs.
- Restrict Editing – You can prevent undesired editing by displaying the document in read-only mode.
Creating Document Editor
Let’s see how to get started with the document editor component in a web application through the following simple steps:
- You can clone the Essential JS 2 quickstart project and install necessary packages by using the following commands.
git clone https://github.com/syncfusion/ej2-quickstart.git quickstart
cd quickstart
npm install
- Dependent packages must be mapped in the system.config.js configuration file.
System.config({
    paths: {
        'npm:': './node_modules/',
        'syncfusion:': 'npm:@syncfusion/'

    },
    map: {
        app: 'app',

        //Syncfusion packages mapping
        "@syncfusion/ej2-base": "syncfusion:ej2-base/dist/ej2-base.umd.min.js",
        "@syncfusion/ej2-file-utils": "syncfusion:ej2-file-utils/dist/ej2-file-utils.umd.min.js",
        "@syncfusion/ej2-compression": "syncfusion:ej2-compression/dist/ej2-compression.umd.min.js",
        "@syncfusion/ej2-buttons": "syncfusion:ej2-buttons/dist/ej2-buttons.umd.min.js",
        "@syncfusion/ej2-popups": "syncfusion:ej2-popups/dist/ej2-popups.umd.min.js",
        "@syncfusion/ej2-navigations": "syncfusion:ej2-navigations/dist/ej2-navigations.umd.min.js",
        "@syncfusion/ej2-inputs": "syncfusion:ej2-inputs/dist/ej2-inputs.umd.min.js",
        "@syncfusion/ej2-splitbuttons": "syncfusion:ej2-splitbuttons/dist/ej2-splitbuttons.umd.min.js",
        "@syncfusion/ej2-dropdowns": "syncfusion:ej2-dropdowns/dist/ej2-dropdowns.umd.min.js",
        "@syncfusion/ej2-data": "syncfusion:ej2-data/dist/ej2-data.umd.min.js",
        "@syncfusion/ej2-lists": "syncfusion:ej2-lists/dist/ej2-lists.umd.min.js",
        "@syncfusion/ej2-documenteditor": "syncfusion:ej2-documenteditor/dist/ej2-documenteditor.umd.min.js"
    },
    packages: {
        'app': { main: 'app', defaultExtension: 'js' }
    }
});

System.import('app');- Add an HTML div element to act as the DocumentEditor in index.html using the following code.
<!--Element which will be rendered as DocumentEditor -->
<div id="DocumentEditor" style="height:800px;"></div>
- Essential JS 2 components support a set of built-in themes, and here we will use the material theme for the document editor. To add the material theme in your application, you need to import material.css in styles.css.
@import '../../node_modules/@syncfusion/ej2/material.css';
- To get started, place the following code in the app.ts.
import { DocumentEditor } from '@syncfusion/ej2-documenteditor';

let documenteditor: DocumentEditor = new DocumentEditor({
    isReadOnly: false
});
documenteditor.enableAllModules();
documenteditor.appendTo('#DocumentEditor');

let sfdt: string =`{
    "sections": [
        {
            "blocks": [
                {
                    "inlines": [
                        {
                            "characterFormat": {
                                "bold": true,
                                "italic": true
                            },
                            "text": "Hello World"
                        }
                    ]
                }
            ],
            "headersFooters": {
            }
        }
    ]
}`;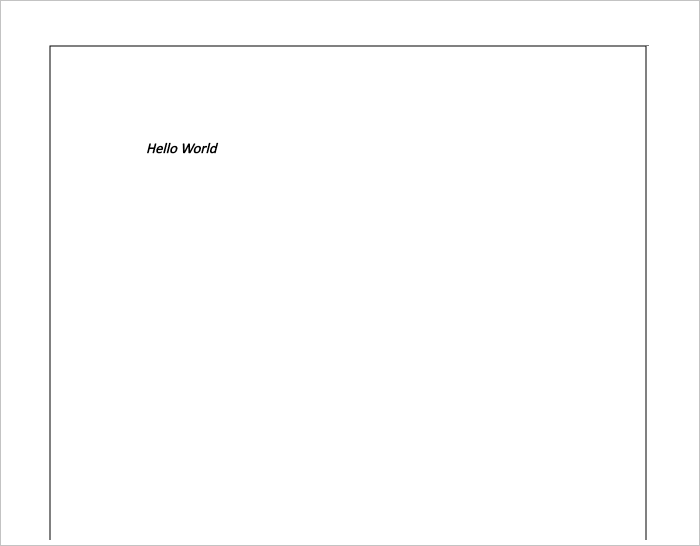
documenteditor.open(sfdt);- Run the following command to start the application.
npm start
Your browser window appears like this.
Opening an existing Word document
In the document editor, the documents are stored in their own format called Syncfusion Document Text (SFDT). However, you can convert Word documents into SFDT format using our “Syncfusion.EJ2.DocumentEditor” library by implementing a web service. This library helps you to convert Word documents (.docx, .doc), rich text format documents (.rtf), and text documents (.txt) into SFDT format.
Let’s see how to implement a web service using an ASP.NET Core application through the following simple steps using Visual Studio.
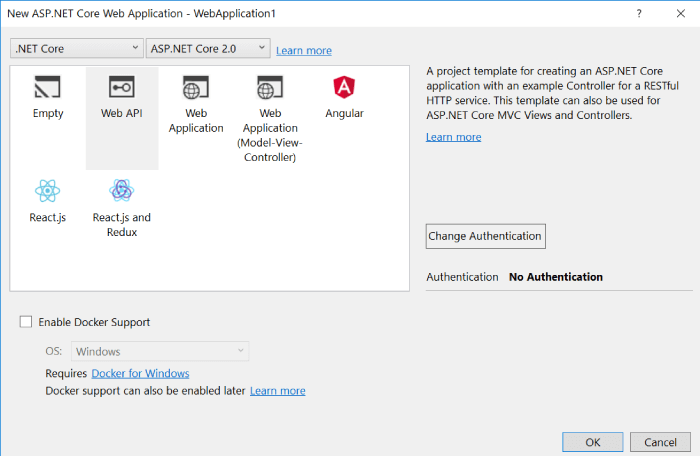
- Open Visual Studio 2017 and choose New project -> .NET Core -> ASP.NET Core Web application.
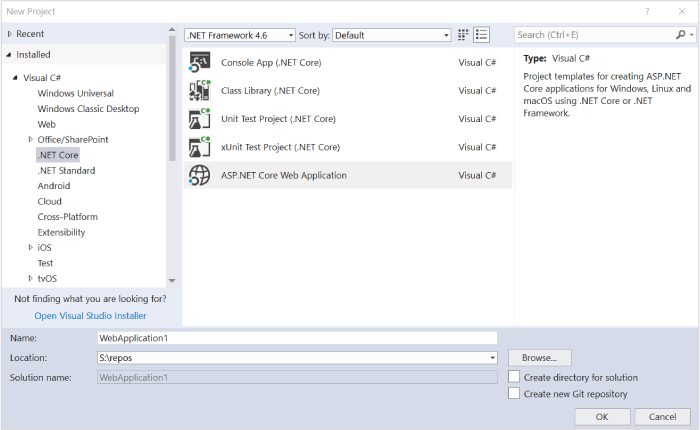
- Choose ASP.NET Core 2.0 and Web API template.
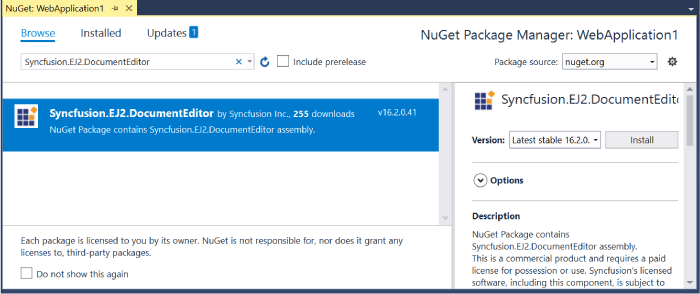
- Add the “Syncfusion.EJ2.DocumentEditor” NuGet package as a reference to the .NET Standard project in your application.
- Add a controller, “DocumentEditorController.cs,” and implement a web API using the following code.
using System;
using System.Collections.Generic;
using System.Linq;
using System.Threading.Tasks;
using Microsoft.AspNetCore.Mvc;
using Syncfusion.EJ2.DocumentEditor;
using Microsoft.AspNetCore.Http;
using System.IO;
using Microsoft.AspNetCore.Cors;

namespace WebApplication1.Controllers
{
    [Route("api/[controller]")]
    public class DocumentEditorController : Controller
    {
        [AcceptVerbs("Post")]
        [HttpPost]
        [EnableCors("AllowAllOrigins")]
        [Route("Import")]

        public string Import(IFormCollection data)
        {
            if (data.Files.Count == 0)
                return null;
            Stream stream = new MemoryStream();
            IFormFile file = data.Files[0];
            int index = file.FileName.LastIndexOf('.');
            string type = index > -1 && index < file.FileName.Length - 1 ?
                file.FileName.Substring(index) : ".docx";
            file.CopyTo(stream);
            stream.Position = 0;

            WordDocument document = WordDocument.Load(stream, GetFormatType(type.ToLower()));
            string sfdt = Newtonsoft.Json.JsonConvert.SerializeObject(document);
            document.Dispose();
            return sfdt;
        }

        internal static FormatType GetFormatType(string format)
        {
            if (string.IsNullOrEmpty(format))
                throw new NotSupportedException("EJ2 DocumentEditor does not support this file format.");
            switch (format.ToLower())
            {
                case ".dotx":
                case ".docx":
                case ".docm":
                case ".dotm":
                    return FormatType.Docx;
                case ".dot":
                case ".doc":
                    return FormatType.Doc;
                case ".rtf":
                    return FormatType.Rtf;
                case ".txt":
                    return FormatType.Txt;
                case ".xml":
                    return FormatType.WordML;
                default:
                    throw new NotSupportedException("EJ2 DocumentEditor does not support this file format.");
            }
        }

    }
}
- Launch the application.
You can download a sample application from this link. You can launch this from the command line or VS Code using the following code.
dotnet restore
dotnet run
Now, let’s see how to use this web service on the client side to implement Word document importing.
- Add an HTML button and file picker in index.html using the following code.
<body>
    <style>
        body{
            overflow: hidden;
        }
        #ContainerPanel{
            position: relative;
        }
        #WaitingPopup {
            display: none;
            height: 800px;
            width: 100%;
            position: absolute;
            top: 0px;
            background-color: #c6c6c6;
            z-index: 10;
        }
    </style>
    <div id="ToolBar">
        <input type="file" id="uploadfileButton" style="position:fixed; left:-100em" />
        <input type="button" id="openButton" value="Open" style="margin:10px 2px;" />
    </div>

    <div id="ContainerPanel">
        <!--Element which will be rendered as DocumentEditor -->
        <div id="DocumentEditor" style="height:800px;"></div>
        <div id="WaitingPopup"></div>
    </div>
</body>
- Place the following code in app.ts to import a Word document upon clicking the Open button.
let fileUpload: HTMLInputElement = document.getElementById('uploadfileButton') as HTMLInputElement;
fileUpload.addEventListener('change', onFileChange);
fileUpload.setAttribute('accept', '.doc,.docx,.rtf,.txt,.sfdt');
// When launched the web service using Visual studio
let host: string = 'http://localhost:23412/';
// When launched the web service using VS Code or command line
//let host: string = 'http://localhost:23413/';
let controller: string = 'api/documenteditor/';
let baseUrl: string = host + controller;
document.getElementById('openButton').addEventListener('click', onOpenClick);
function onOpenClick(): void {
fileUpload.value = '';
fileUpload.click();
}
function onFileChange(args: any): void {
if (args.target.files[0]) {
let path = args.target.files[0];
if (path.name.substr(path.name.lastIndexOf('.')) === '.sfdt') {
let fileReader: FileReader = new FileReader();
fileReader.onload = (e: any) => {
let contents: any = e.target.result;
documenteditor.open(contents);
};
fileReader.readAsText(path);
documenteditor.documentName = path.name.substr(0, path.name.lastIndexOf('.'));
} else {
loadFile(path);
}
}
event.preventDefault();
};
function loadFile(path: any): void {
let httpRequest: XMLHttpRequest = new XMLHttpRequest();
httpRequest.open('POST', baseUrl + 'Import', true);
let waitingPopUp: HTMLElement = document.getElementById('WaitingPopup');
waitingPopUp.style.display = 'block';
httpRequest.onreadystatechange = () => {
if (httpRequest.readyState === 4) {
if (httpRequest.status === 200 || httpRequest.status === 304) {
documenteditor.open(httpRequest.responseText);
waitingPopUp.style.display = 'none';
} else {
waitingPopUp.style.display = 'none';
console.error(httpRequest.response);
}
}
}
let formData: FormData = new FormData();
formData.append('files', path);
httpRequest.send(formData);
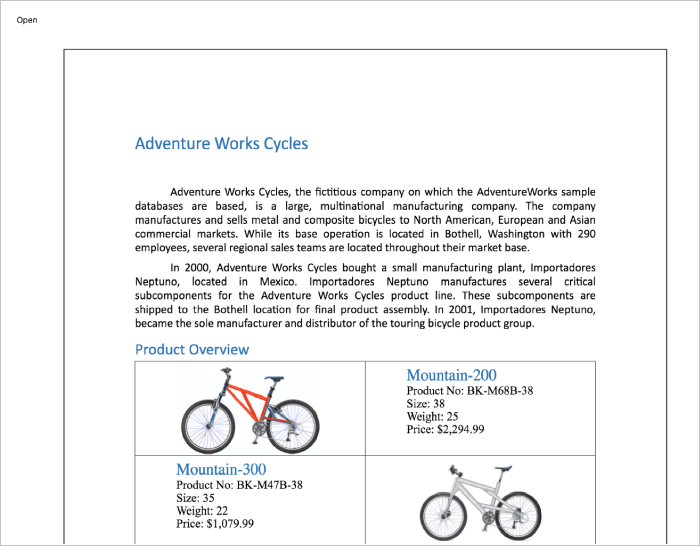
};Your browser appears like this.
Document Editor – Modules
All of the features we’ve explored are segregated into individual modules based on feature to enable selective referencing, so only the features you need are included in your application. By default, the document editor displays the document in read-only mode. You can choose the required modules based on the features needed for your application. The following are the selectable modules of the document editor which can be included as required.
- Editor – This module allows you to perform a variety of editing operations.
- EditorHistory – This module allows you to maintain the history of editing operations so that you can perform undo and redo operations at any time.
- Print – This module allows you to print the document.
- Selection – This module allows you to select a portion of the document and copy it to the clipboard.
- Search – This module allows you to search for specific text and navigate between the results.
- SfdtExport – This module allows you to export the document as a Syncfusion Document Text (.SFDT) file.
- WordExport – This module allows you to export the document as a Word document (.DOCX) file.
- TextExport -This module allows you to export the document as a text (.TXT) file.
- User interface options such as context menu, options pane, image resizer, and dialog are available as individual modules. To find complete information about the modules, please refer to this link.
Summary
Overall, the document editor component was designed to be completely modular and provide optimal performance while being highly flexible.
If you would like to try the document editor component, you can download our free trial. You can visit the document editor source in GitHub, and you can check our sample browser and documentation for detailed explanations and the facts you need to proceed further.
If you have any questions or need any clarification, please let us know in the comments section below. You can also contact us through our support forum or Direct-Trac. We are always happy to assist you!
If you like this blog post, we think you’ll also like the following free e-books: