
This post is part of our ongoing how-to series about using the Syncfusion Dashboard Platform. In this post, we’ll review how to use the Dashboard Platform’s image widget. On our YouTube channel you’ll find a full video on this topic.
You can use the image widget to display static images like a company logo as well as dynamic images like the image of a product or salesperson. With the Syncfusion Dashboard Platform, many options are available, and this blog post will demonstrate how to take advantage of them. Note that the information in this post assumes that the Dashboard Designer is installed and up to date.
We’ll begin by adding a new data source by clicking the Add data source button. In the sample data source, we have the sales details of a company in one table and the employee details, including profile images, in another. Next, we create a dashboard to display the sales performance of the employees, renaming the data source “Sales details” and naming the dashboard “Sales performance.”
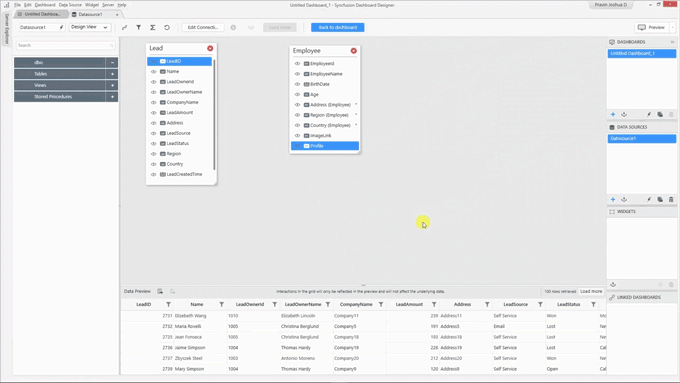
Figure 1: Adding a Data Source
The dashboard is now built and contains a number of details, including total leads, converted leads, and the comparison between the current month and previous month. We have included a combo box filter element, and by making use of it we can choose one salesperson at a time and view the details specific to that salesperson. We’re going to add an image widget in the left corner so that when a salesperson is selected, the corresponding profile picture is displayed.
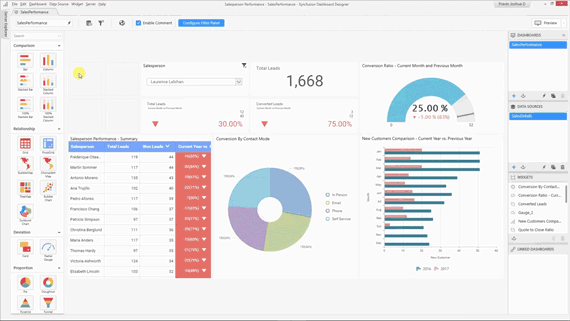
Figure 2: Adding the Image Widget
The image widget can be found in the Miscellaneous category of the toolbox. Once it’s dragged into place, we can configure the image widget by clicking the Configure button. As mentioned previously, the image widget has the ability to display both static and dynamic images. To display a static image, clear the Bind from database option and select an image using the file picker. Click the Set image button and select the desired image.
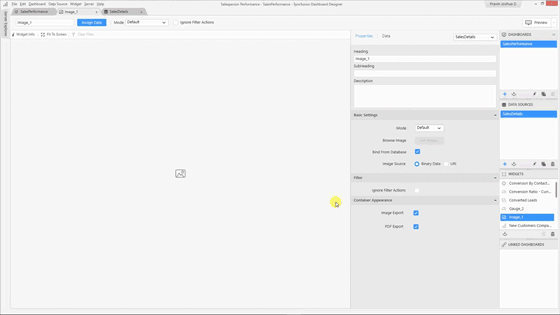
Figure 3: Setting a Static Image
The Bind from database option allows us to load dynamic images. Images can be loaded from binary data in our database and from web URLs. In our data source, we have profile pictures as binary data in one of the fields. Returning to the image widget, in the data section, we simply drag and drop the profile field to render the image as we expected.
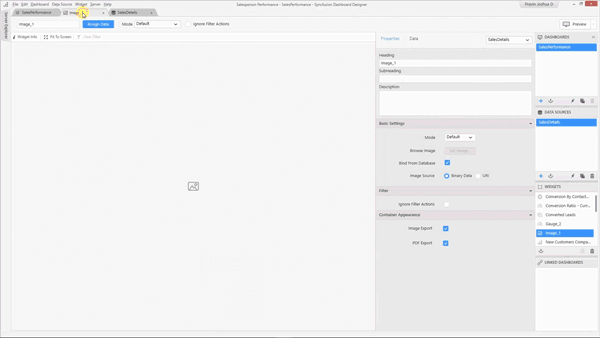
Figure 4: Setting a Dynamic Image
Back in the dashboard, clicking the Preview button allows us to check how our images are displayed in the Dashboard Viewer. We can select other employees to see that images are dynamically loaded based on the selected salesperson.
Now, let us take a look at the URL option. We can provide the web URL of a desired image and load images dynamically. In our website, we have a profile picture for each employee. As we can see, the URL contains a pattern: the employee ID and the image name. These parameters change for every employee.
We can simply copy this link and paste it into the Pattern text box. Instead of providing a static link, we’re going to replace both fields—that is, the employee ID and the image name—with arguments so that the image can be dynamically changed and the corresponding correct images will be loaded. We’ll edit this and replace the field with arguments in curly braces.
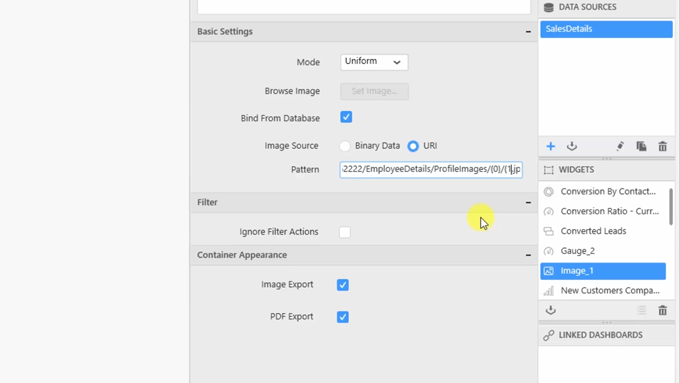
Figure 5: Creating a Dynamic Link Formula
The dynamic link with the pattern is now constructed successfully. In our database, we have the employee ID field as well as the image name in the image link field. Returning to the image widget, we have to provide values for the arguments in the Data section. The first argument is the employee ID, so we can remove that and drag and drop the employee ID field to the correct location. The second argument is the image name. We have it in the image link field, so we can drag and drop it into place. The image is now loaded successfully. Previewing the dashboard again, we can see how our updated images are being rendered, even if we update the salesperson.
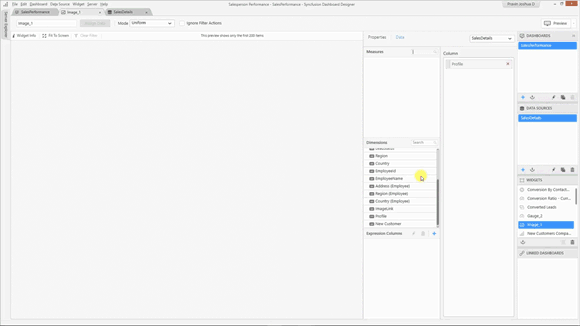
Figure 6: Creating a Dynamic Link with a Pattern
If you have the complete hyperlink to the image in the database itself, there is yet another way to display the image. Go to the image widget. In the Pattern text box, provide an empty argument. In the Data section, we can directly add the hyperlink to the column. We can see the image is now rendered.
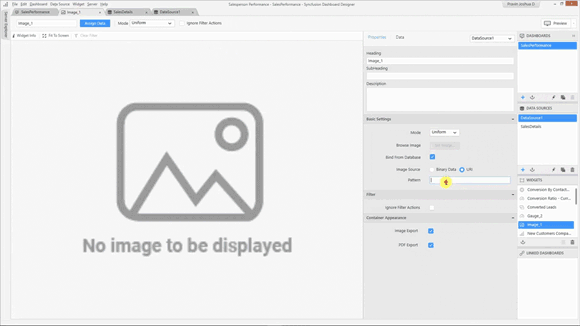
Figure 7: Adding an Image via Direct Hyperlink
With our images rendered properly, it’s time to publish the dashboard. From the server menu, choose the Publish Dashboard option. Click the Publish button to publish the dashboard. To test the published dashboard, we’ll set another salesperson and check how the image widget is rendered.
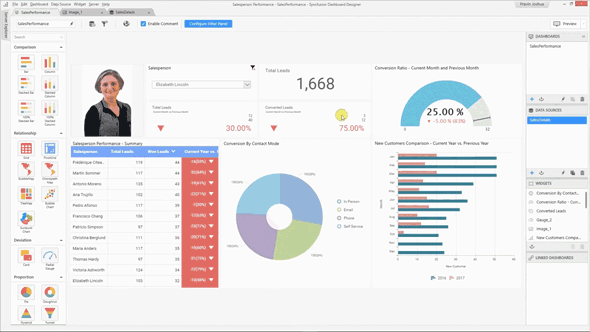
Figure 8: Publishing the Dashboard
The Dashboard Designer also provides customizations to modify the image mode. There are several modes available:
- A default mode in which the image will be preserved in its original size.
- A fill mode where the image will be stretched across the entire image widget.
- A uniform mode where the original aspect ratio of the image will be preserved.
You can check out all the mode details in the documentation.
There is also an Ignore filter actions option available. If your image is bound to the database and you want or need to ignore filter actions, you can use this option. Be aware that this may be ineffective if you are loading a static image using the Browse image option.
For more information about Dashboard Platform features, see our documentation. If you have yet to use the Syncfusion Dashboard Platform, try it out with a free, 30-day trial.
If you liked this post, we think you’ll love these free e-books:
BI Solutions Using SSAS Tabular Model Succinctly
MongoDB 3 Succinctly
Hadoop Succinctly
Power BI Succinctly
R Programming Succinctly


